Nathan Segal Art
How to Use Camera RAW and Camera Shake Reduction in Photoshop
In this article we look at the new features available with Camera RAW and Camera Shake Reduction. To begin we will have a look at the new features in Camera RAW.
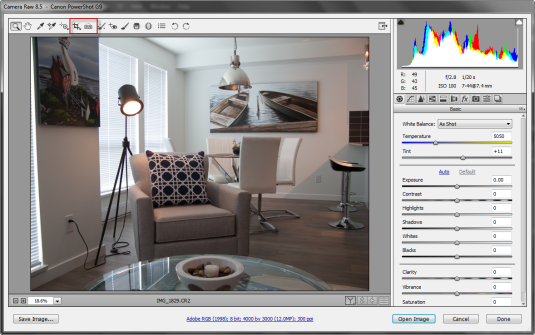
To get started, go to the File: Open and choose a Camera RAW image.
One of the main improvements is with Auto Straighten, which allows you to straighten images in three ways. One is to double-click on the Straighten Tool icon in the toolbar or, with the straighten tool selected to double-click anywhere within the preview image.
A third option is to select the Crop Tool and press the command key (this temporarily activates the Straighten Tool) and after that, double-click within the preview image.
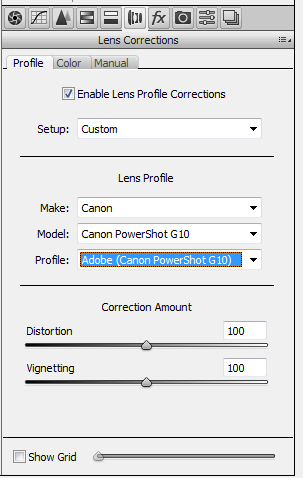
With this particular image it does straighten the image but only slightly. If you want more control you would need to go to the right side of the Camera RAW dialog box and click on the Lens Correction icon.
After that, check Enable Lens Profile Corrections and choose your Camera make and model from the list. If your camera model isn’t available, you can click on the Manual tab and make corrections for barrel distortion and perspective there.
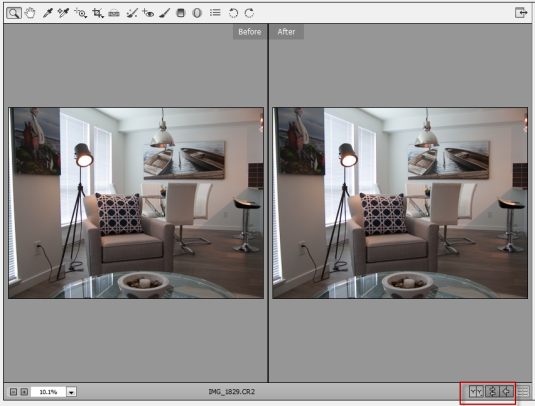
Some other new features make it possible to toggle between before and after previews which can be arranged vertically or horizontally by clicking on the icon at the bottom of the image preview window. The icons to the right of that indicate the image orientation setting.
Other New Features
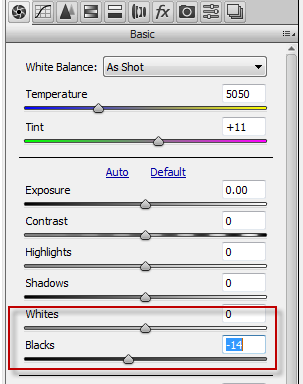
A new feature concerns the Whites and Blacks. When you shift-double-click you get auto levels-levels like results.
There have been new additions (Natural, Muted, Portrait, Vivid) for some Olympus camera models. Information is available on this page. In addition, there is a great deal of information on all the camera models currently supported.
Camera Shake Reduction
As a photographer, it is inevitable that you will wind up with the occasional blurry image. Fortunately, Adobe has developed a way of repairing those images.
There are some conditions though. Camera shake reduction works best with well-lit images with low noise. Indoor or outdoor images with a long focal length are good, as well as indoor images of a still life with a slow shutter speed and no flash.
Another place where shake reduction can help is when camera motion causes text to be blurred in images. It’s also not the best for high ISO images, dark images or images with a lot of grain.
Note: If the camera shake is severe, the shake reduction might not work (as I found out when testing it with an image of my own).
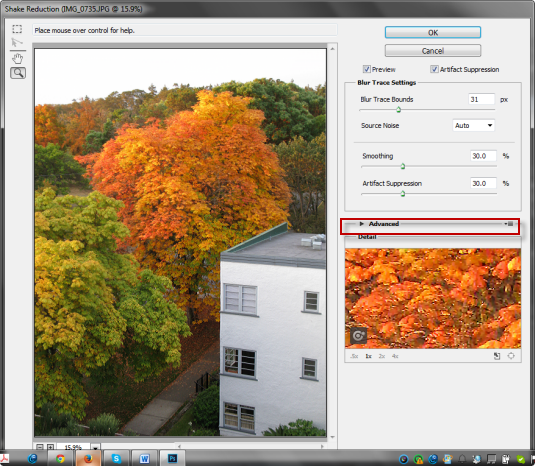
To get started, open the image you want to repair. Next, click on Filter: Sharpen: Shake Reduction. This opens the Shake Reduction dialog box. As it opens, Photoshop automatically analyzes the image, the nature of the blur, selects an area which it thinks is best for shake reduction and applies the appropriate corrections to the image.
Once done, you can see the corrected image in the Shake Reduction dialog box.
In the image above, the area which Photoshop uses isn’t obvious and the reason for that is the Advanced section isn’t open (as highlighted in the screen shot).
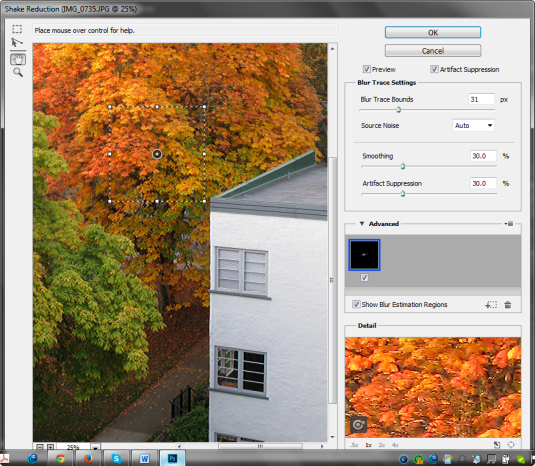
When you open the Advanced section, you see a Blur Estimation Region there, which is also represented by a box drawn in the image preview. You can use this position, you can move it to another location or you can draw addition blur estimations, ones which you feel would be better for the image.
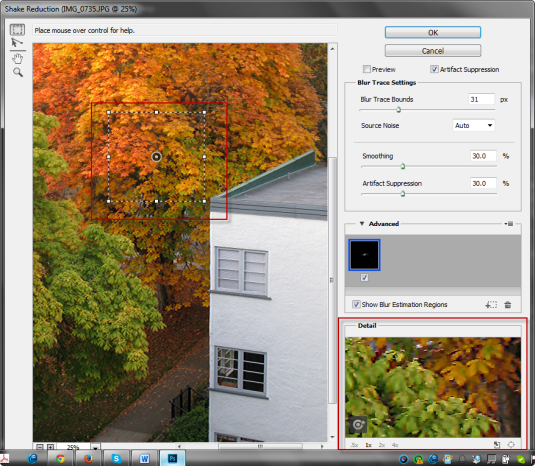
Before we do that, we will zoom into the image. Notice also, at the lower-right of the dialog box is a Detail section, which allows you to see more of what is going on with the image. In the lower-left of that section is a detail loupe, which allows you to see more of what is going on in the image. To activate it, click on the dotted square icon at the top-left of the dialog box. The cursor changes into a large crosshair icon. When you click anywhere in the image, the results will be displayed in the Details panel. You can also use this icon to change the size of the Blur Estimation box.
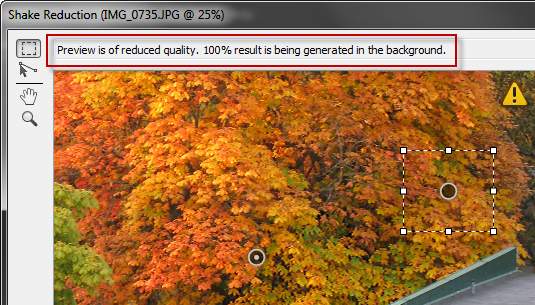
Now it is time to draw another Blur Estimation Box. Note the new icon which appears in the Advanced section. You will see an icon in the center of each Blur Estimation Box. When you click on it, you will see a message at the top-right of the image preview which will read: “rendering a coarse preview.” When it completes that preview you will notice a caution icon at the top-right of the preview. If you click on it, the message reads: “Preview is of reduced quality. 100% result is being generated in the background.”
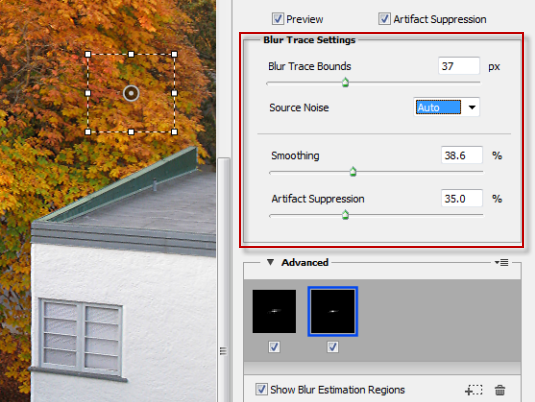
You can add as many Blur Estimation Boxes as you need to the image. As you do so, this will reduce camera shake and add some sharpening. It will also introduce some artifacting, which you will see as bits of clumping in the image. You can manage this by changing the bounds used to trace the blur. You also can increase the Smoothness and Artifact Suppression by moving the sliders to the right.
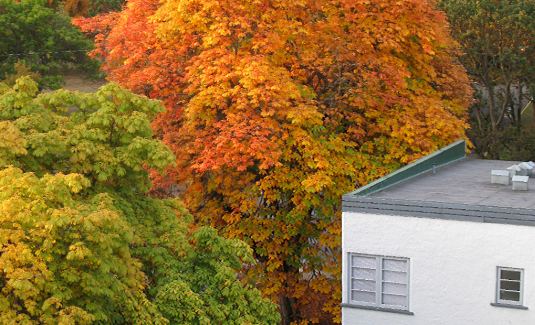
When you are satisfied with your changes, click on OK. In the finished image Photoshop has considerably improved the sharpness.
Observations
One thing I found really frustrating was that there was no before and after preview. That would have made a huge difference. Without it I felt like I was flying blind with the process.
Conclusion
Overall there have been some great improvements in both Camera RAW and Camera Shake Reduction. I like the before and after previews in Camera RAW, the automatic image straightening and the addition of new profiles. With Camera Shake Reduction there are a great many tools to use for the right image. Devoting the time to doing that could be well worth it. You might be surprised with your results.
Written by:
Nathan Segal
SHARE


About me
Hi there 👋 My name is Nathan Segal, I'm the creator of This Blog. Here, you can view my portfolio and read my articles which are all about art and tutorials


Created with ©systeme.io